
How to Lay Tile Floors in Houston Kitchens
Laying tile floors in your Houston kitchen can really change up the space, plus they'll handle the city's heat and humidity like champs. To get it right, focus on good surface prep, pick moisture-resistant materials that work for Houston, and follow solid layout and grouting techniques. A lot of homeowners feel intimidated by this project, but breaking it into steps makes it way less overwhelming.
Houston’s climate throws some curveballs when it comes to kitchen flooring. High humidity and temperature swings can mess with how tiles and adhesives behave.
If you get what you’re up against locally, you can choose the right materials and methods for a floor that actually lasts.
This guide covers every stage of the tile installation process. You’ll find out how to prep your floor, pick the right tiles and tools, and install everything for a result that looks pro.
Key Takeaways
Prep your floor and consider Houston's climate for a tile job that holds up
Pick tile materials and adhesives made for humid conditions to avoid headaches later
Stick to a step-by-step layout and installation for a finish you’ll be proud of
Preparing Your Houston Kitchen for Tile Flooring
Getting your kitchen floor ready isn’t hard, but it does take some attention to detail. Check your subfloor structure, clean and level everything, and add the right protective layers.
These steps keep your tile floor from cracking or shifting down the road.
Assessing and Repairing the Subfloor
Check that your subfloor feels solid before you start tiling. Walk around and listen for squeaks or spots that feel squishy.
If you’ve got a plywood subfloor, make sure the total thickness is at least 1-1/8 inches. That’s enough to support heavy ceramic or porcelain tiles.
Tighten up any loose boards with screws every 8 inches along the joists.
For concrete subfloors, look for cracks wider than 1/8 inch. Patch them with concrete compound and let them dry all the way.
Strip away paint, wax, or sealers from the concrete with a grinder or chemical stripper.
If you find rotted wood or crumbling concrete, don’t try to patch, just replace the damaged sections. For serious concrete issues, you might need a pro to check if the foundation is okay.
Cleaning and Leveling the Surface
Vacuum up all the dirt and debris, then go over the subfloor with a damp mop. Any leftover grime keeps the adhesive from sticking right.
Use a 4-foot level to spot dips or high spots. Mark any gaps you see under the level.
Your floor needs to be flat within 1/4 inch over 10 feet for a solid tile job.
Fill low spots with floor leveling or self-leveling compound. Mix it up as the package says and pour it in—self-leveling stuff pretty much spreads itself out.
Grind down high spots on concrete with a grinder. For plywood, sand down raised areas or add thin strips to even things out.
Moisture Barriers and Backer Boards
Houston’s humidity is no joke, so moisture protection is a must. Put down a moisture barrier over plywood subfloors to guard against water damage.
Lay cement backer board over your prepped subfloor. These boards handle moisture and give your tiles a stable base.
Cut the backer board to fit, leaving a 1/4-inch gap at the walls.
Drive backer board screws every 8 inches to keep things secure. Make sure the screw heads are flush with the surface.
Stagger the seams so they don’t line up with subfloor seams underneath.
Fill the gaps between boards with thin-set mortar. Press fiberglass mesh tape into the mortar over every seam.
This step helps keep cracks from showing up in your finished tile.
Selecting and Installing Tile Floors in Houston Kitchens
Picking the right materials, planning your layout, cutting everything properly, and grouting the right way all matter for a kitchen tile installation that can handle daily use.
Each step builds on the last, so don’t skip around.
Choosing Kitchen Floor Tiles and Materials
Porcelain tile is a top pick for Houston kitchens. It shrugs off moisture and stands up to heavy foot traffic.
Porcelain is denser than ceramic tile and less likely to chip or crack.
Ceramic tile is cheaper but soaks up more water, so only use it if your kitchen’s got great ventilation.
Natural stone tiles like slate or travertine add a cool, unique look, but you’ll need to seal them regularly to keep stains at bay.
Large format tiles (12x24 inches or bigger) mean fewer grout lines and easier cleanup. Smaller tiles, like 12x12, give you more design options but take longer to install.
Think about how tile size will affect your layout before you buy.
Always pick tiles with a slip-resistant surface. For kitchens, look for a Coefficient of Friction (COF) of 0.42 or higher.
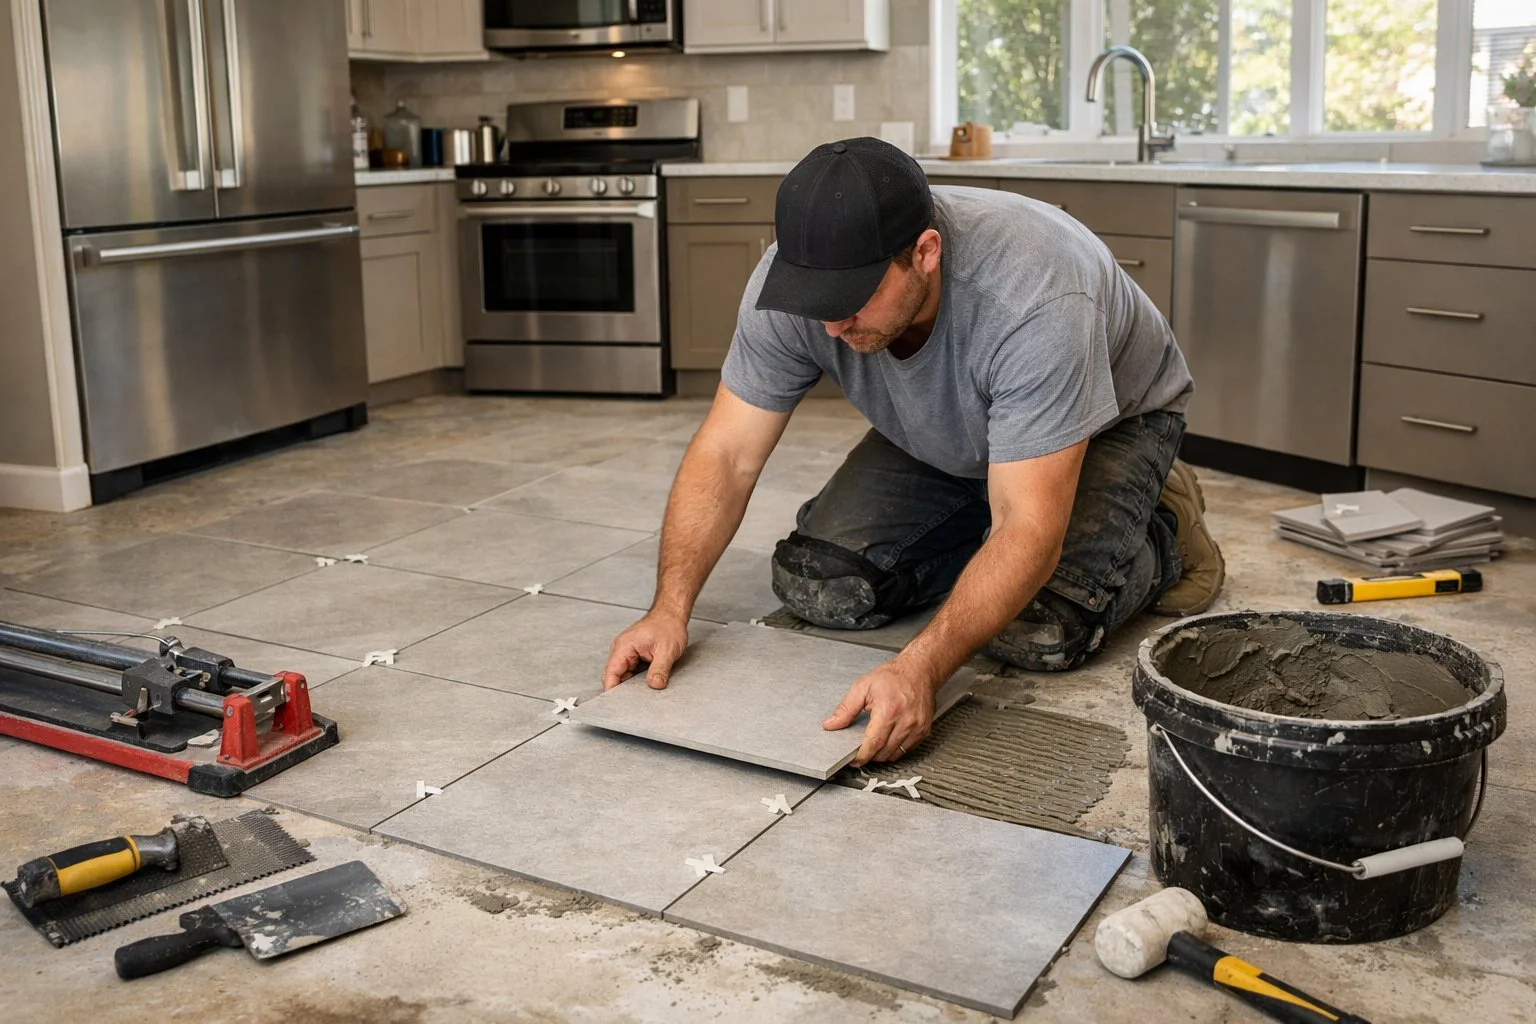
Planning and Laying Out Tiles
Find the center of your kitchen floor to start your layout. Measure and mark the midpoint of each wall, then snap chalk lines to make a cross.
Lay out tiles dry (no adhesive yet) along your chalk lines. This lets you see how everything fits and if you’ll end up with tiny slivers at the edges.
If you see you’ll have to make really narrow cuts at the walls, adjust your starting point. Try to keep cut tiles at least half a tile wide for a cleaner look.
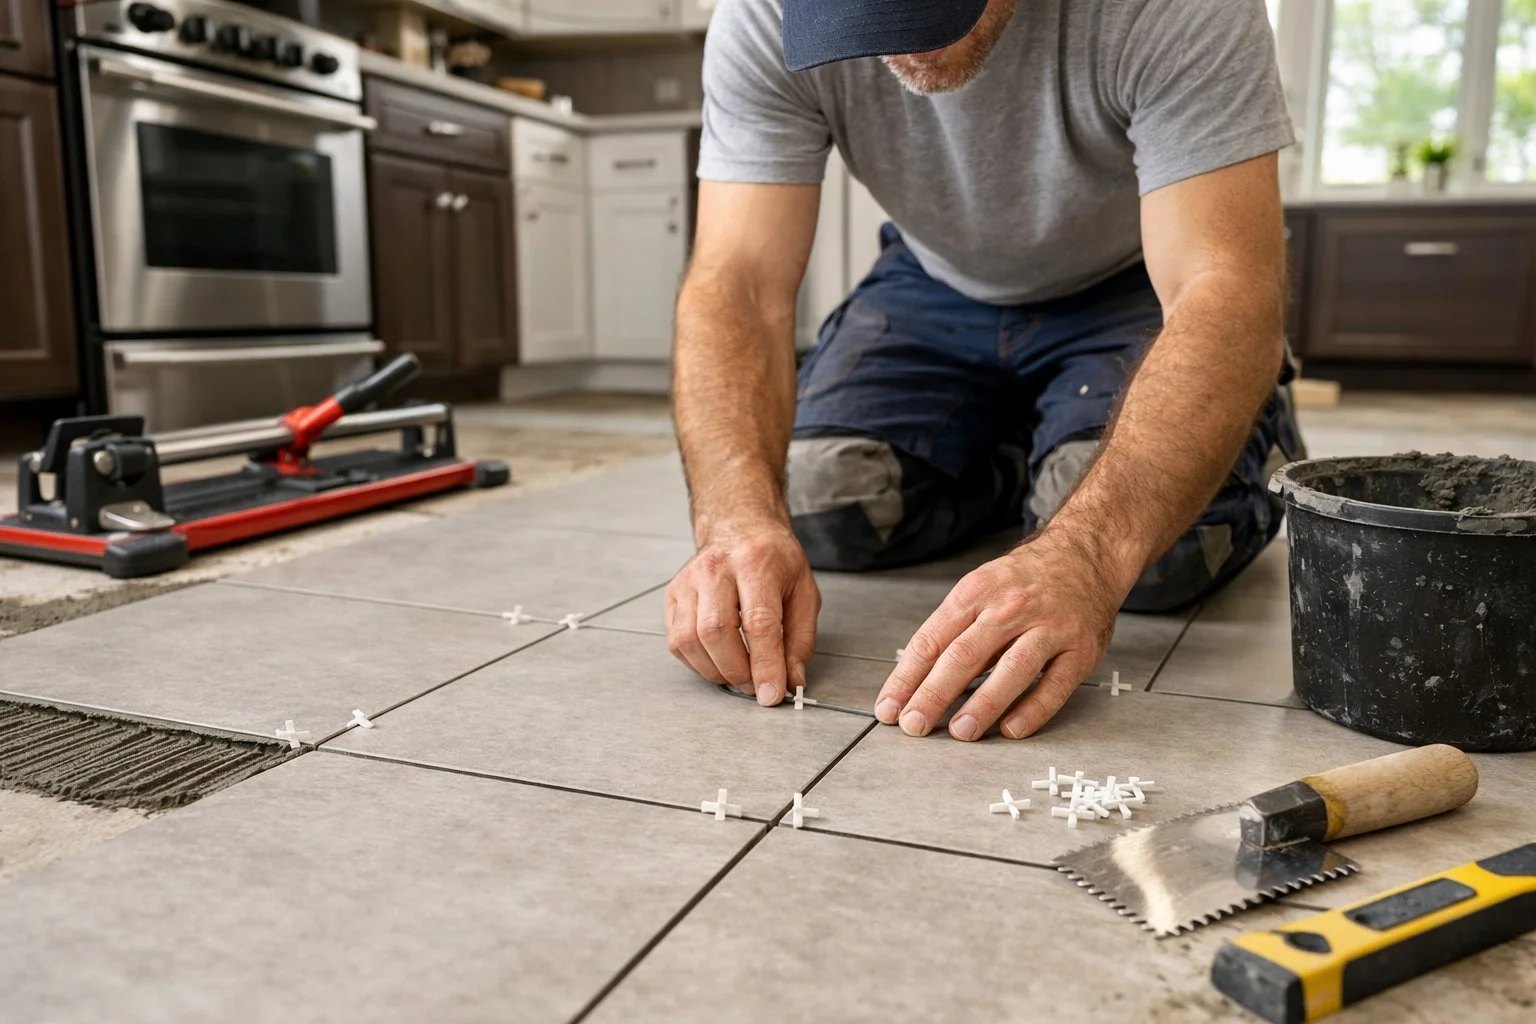
Decide where your tile spacers will go for even grout lines. Most kitchen floors use 1/8-inch or 3/16-inch spacers.
Mark spots that need special cuts around cabinets, islands, or appliances.
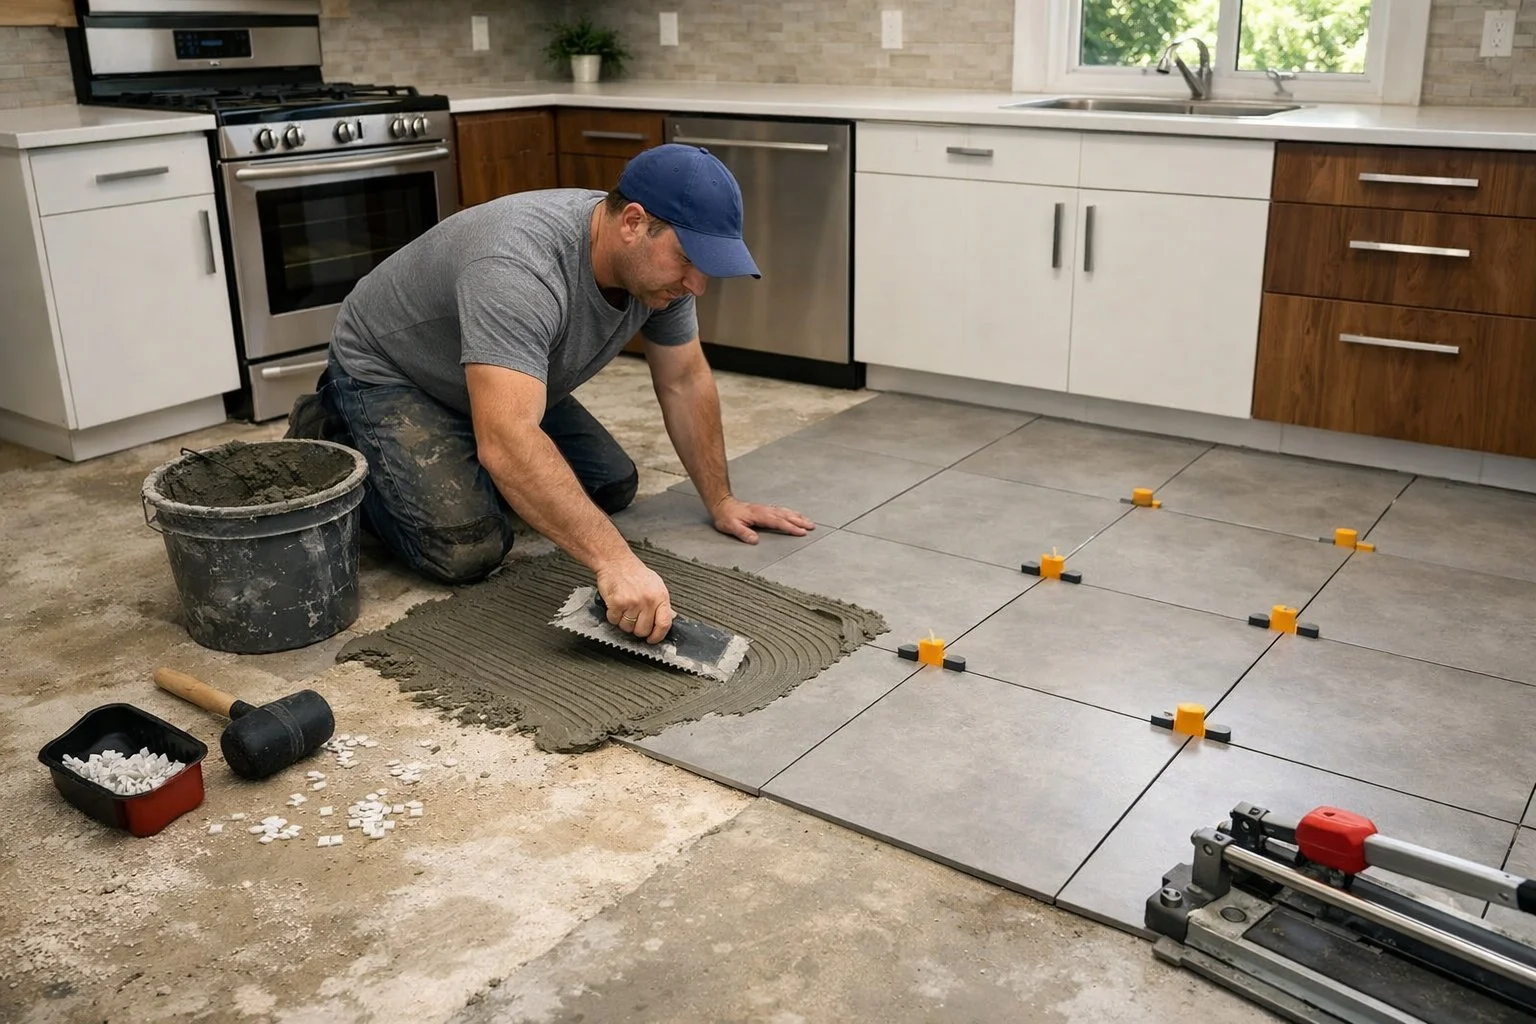
Cutting and Setting Floor Tiles
Mix up your thin-set mortar (sometimes called thinset) according to the package. A drill with a mixing paddle works best.
Aim for a consistency like thick peanut butter.
Spread the tile adhesive with a notched trowel at a 45-degree angle. Use 1/4-inch notches for tiles up to 8 inches, 3/8-inch for large format tiles.
Only spread enough thinset for a few tiles at a time so it doesn’t dry out.
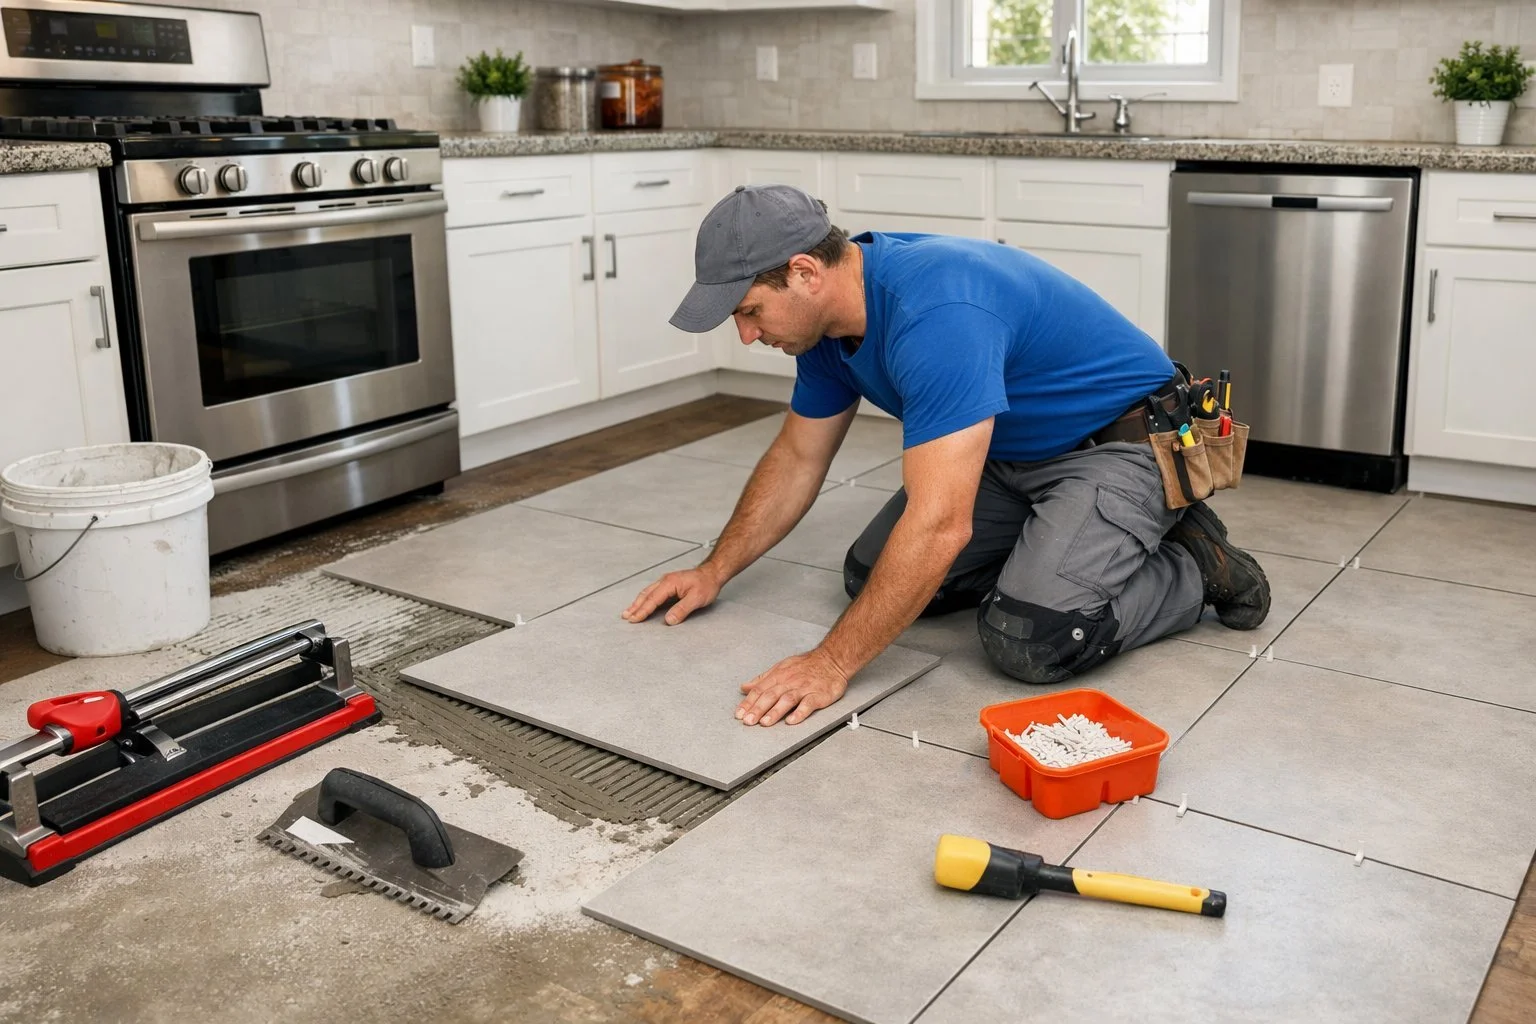
Press each tile into the mortar with a little twist. Pop in tile spacers at the corners to keep gaps even.
If a tile sits too high, tap it down gently with a rubber mallet.
Use a wet saw or tile saw for straight cuts on ceramic and porcelain. For thinner tiles, a manual tile cutter can do the trick.
Tile nippers help with curved cuts around pipes or odd corners.
Grouting and Sealing for Lasting Protection
Wait at least 24 hours after laying your tiles before you start grouting. Pull out all the spacers and clean off any dried thinset from the tile faces.
Pick sanded grout for joints wider than 1/8 inch, or unsanded grout for tighter spaces. Epoxy grout costs more but fights stains in busy kitchens.
Mix grout until it’s like toothpaste.
Spread grout diagonally over the tiles with a grout float at a 45-degree angle. Make sure you press it into every joint.
Work in small sections, maybe 10 square feet at a time.
After 15–20 minutes, wipe off extra grout with a damp grout sponge. Rinse the sponge often and wipe diagonally so you don’t pull grout out of the joints.
You’ll see a light haze on the tiles, don’t worry.
Once the grout dries, buff away the haze with a clean cloth. For really stubborn spots, use grout haze remover.
After 48–72 hours, seal the grout to keep out stains and moisture.
Frequently Asked Questions
Laying tile floors in Houston kitchens takes a bit of know-how, especially when it comes to prep and working with the local climate. Here are some of the most common questions folks have about tile installation.
What are the essential steps for laying tile floors in a kitchen?
Start by tearing out the old flooring and cleaning the subfloor really well. Make sure the surface is level and fix any issues before you go any further.
Put down cement backer board over the subfloor for a stable, moisture-resistant base, super important with Houston’s humidity.
Measure and mark layout lines from the center of the room outward. This keeps your tiles centered and symmetrical.
Spread thin-set mortar with a notched trowel, then press tiles firmly into place. Use spacers to keep grout lines around 1/8 inch.
Wait 24 hours for the mortar to set, then grout between the tiles. Once the grout dries, seal it to block stains and moisture.
Can you provide tips for beginners on how to properly install floor tiles?
Buy 10–15% more tile than you think you’ll need to cover cuts and breakage. It’s way better than running short or dealing with color mismatches.
Rent or buy a good wet saw for clean, safe cuts. Practice on scrap tiles before you cut the real ones.
Work in small sections, about 3–4 square feet at a time, so your mortar doesn’t dry out before you set the tiles.
Twist tiles down a little as you set them to help them stick. Keep checking with a level so your floor stays flat.
What is the best way to lay 12x12 tiles in a kitchen setting?
Find the center of your kitchen floor by crossing two measured lines. That’s your starting reference for a balanced layout.
Dry lay a row of tiles from the center to each wall before you use mortar. This shows you where you’ll need to make cuts.
Start laying tiles at the center and work out toward the walls. That way, full tiles stay in the most visible spots and cut tiles end up along the edges.
Use 1/8-inch spacers everywhere for nice, even grout lines.
How should floor tiles be laid on a concrete kitchen floor?
Clean the concrete well and patch any cracks or low spots with compound. The surface needs to be smooth and dust-free.
If your floor is new or super porous, roll on a concrete primer. This helps the thin-set mortar stick.
Use a latex-modified thin-set mortar made for concrete. Mix it until it’s about as thick as peanut butter.
Spread the mortar with a notched trowel at a 45-degree angle so you get good coverage and adhesion.
In what direction should tiles be laid to maximize the aesthetic appeal of a kitchen?
Lay rectangular tiles parallel to the longest wall in your kitchen. This makes the space feel bigger.
You can also run tiles toward the main entrance or a focal point to guide the eye through the room.
Square tiles like 12x12s can go straight or diagonally. Diagonal layouts look cool but take more cuts.
If your kitchen opens into other rooms, match the tile direction for a smooth, connected feel.
What common mistakes should be avoid when installing kitchen floor tiles?
First off, make sure you actually prep and level your subfloor. If you leave the surface uneven, tiles can crack, and you’ll end up with lippage, those annoying edges that never sit flush.
Watch out for the amount of thin-set mortar you use. Using too much makes your tiles sit all wonky, but too little? That just means they won’t stick right, and you’ll probably deal with loose tiles later.
Seriously, don’t walk on your new tiles until the mortar cures for at least 24 hours. If you walk on them too soon, you might shift them out of place and weaken the whole installation.
Take your time with the grout, and don’t forget to seal it when you’re done. Especially in humid places like Houston, unsealed grout gets stained and mildewy way too fast.